
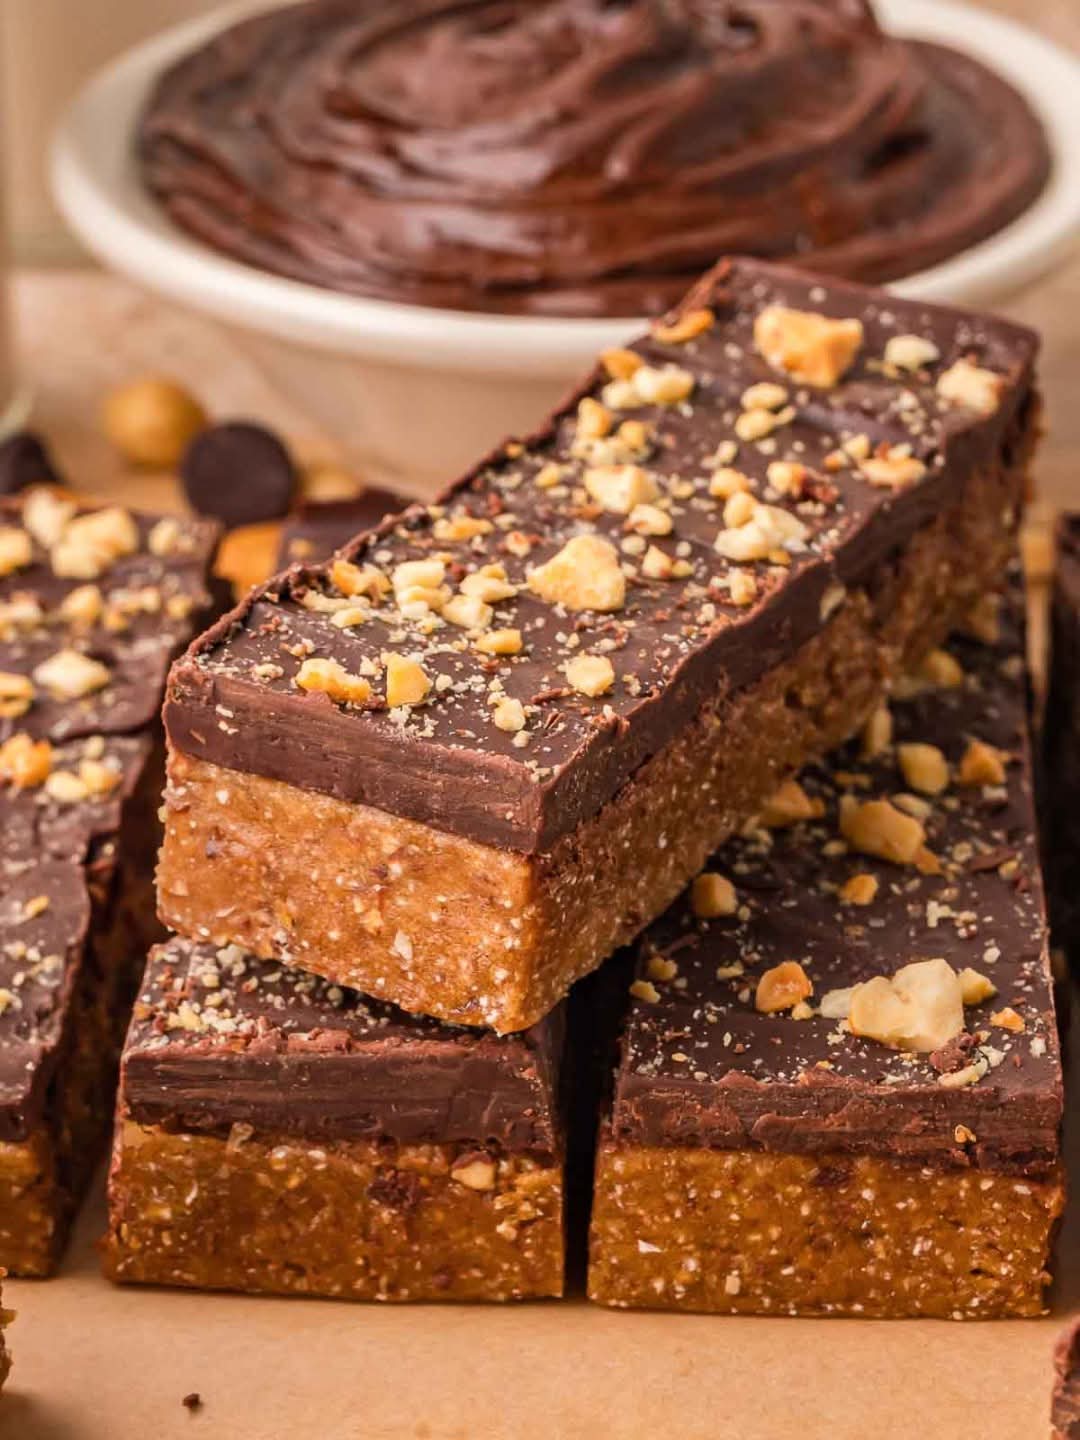
Chocolate Peanut Butter Protein Bars
Description
These Chocolate Peanut Butter Protein Bars are the perfect no-bake snack when you want something chocolatey, creamy, satisfying, and packed with protein. With more than 17 grams of protein per bar, they make an excellent grab-and-go breakfast, post-workout snack, afternoon treat, or simple dessert.
The best part is that there is no oven required. Everything comes together in one bowl, then the mixture is pressed into a pan, chilled, and sliced into bars. The combination of natural peanut butter, chocolate protein powder, oats, cocoa, and a little sweetness creates a rich texture that tastes more like a treat than a traditional protein snack.
These bars are also easy to customize. You can add chopped nuts, coconut, mini chocolate chips, or a thin chocolate topping depending on how indulgent you want them to be.
Recipe Information
Prep Time: 15 minutes
Chill Time: 1–2 hours
Total Time: About 1 hour 15 minutes
Servings: 8 bars
Difficulty: Easy
Method: No-Bake
Cuisine: American-Inspired Snack
Ingredients
For the Protein Bars:
1 1/2 cups old-fashioned rolled oats
1 cup creamy natural peanut butter
1/2 cup chocolate protein powder
1/4 cup unsweetened cocoa powder
1/4 cup honey or pure maple syrup
1/4 cup milk of choice
1 teaspoon vanilla extract
1/4 teaspoon salt
2 tablespoons ground flaxseed, optional
2 tablespoons mini dark chocolate chips, optional
For the Chocolate Peanut Butter Topping:
2 tablespoons creamy peanut butter
1/3 cup dark or semi-sweet chocolate chips
1 teaspoon coconut oil, optional
Instructions
Step 1: Prepare the Pan
Line an 8-inch square baking pan with parchment paper, leaving some parchment hanging over the sides. This makes it much easier to remove the chilled bars later.
You can lightly grease the pan before adding the parchment to help it stay in place.
Step 2: Combine the Dry Ingredients
Add the rolled oats, chocolate protein powder, unsweetened cocoa powder, salt, and ground flaxseed to a large mixing bowl.
Stir everything together until the protein powder and cocoa are evenly distributed.
Breaking up any cocoa or protein powder lumps at this stage will make the finished bars smoother.
Step 3: Add the Peanut Butter
Add the creamy peanut butter to the dry mixture.
If your peanut butter is very thick, gently warm it for 10–15 seconds in the microwave. It should become soft and easy to stir, but it does not need to be hot.
Add the honey or maple syrup, milk, and vanilla extract.
Step 4: Mix the Batter
Stir everything together with a sturdy spoon or spatula.
At first, the mixture may appear dry and crumbly. Continue mixing until the oats are coated and the mixture begins to form a thick, sticky dough.
If the mixture is still too dry to press together, add another tablespoon of milk at a time until you reach the desired consistency.
Be careful not to add too much liquid. The mixture should be thick enough to hold its shape when pressed.
Step 5: Add Chocolate Chips
If you’re using mini chocolate chips, fold them into the mixture.
You can also add chopped almonds, walnuts, pecans, shredded coconut, or cacao nibs at this stage.
Step 6: Press Into the Pan
Transfer the mixture to the prepared pan.
Using the back of a spoon, spatula, or the bottom of a glass, firmly press the mixture into an even layer.
This step is important. Pressing the mixture firmly helps prevent the bars from becoming crumbly when sliced.
Pay special attention to the corners and edges.
Step 7: Prepare the Topping
For the optional chocolate topping, place the chocolate chips and coconut oil in a microwave-safe bowl.
Heat in 15–20 second intervals, stirring between each interval, until smooth.
Alternatively, melt the chocolate gently using a double boiler.
Drizzle the melted chocolate over the protein bar mixture.
Warm the peanut butter slightly and drizzle it over the chocolate. Use a toothpick or knife to create a simple swirl.
Step 8: Chill
Place the pan in the refrigerator for at least 1 hour, or until the mixture is firm.
For an even firmer texture, chill for 2 hours.
If you’re in a hurry, you can place the pan in the freezer for about 30–45 minutes.
Step 9: Slice
Lift the chilled mixture out of the pan using the parchment paper.
Place it on a cutting board and slice into 8 bars.
For smaller snack portions, cut into 10–12 bars instead.
Store the finished bars in the refrigerator until ready to serve.
Notes
The consistency of these bars depends on the type of protein powder and peanut butter you use. Some protein powders absorb significantly more liquid than others.
If the mixture seems dry, add milk gradually. If it seems too soft, add a little more oats or protein powder.
Natural peanut butter works especially well, but conventional creamy peanut butter can also be used.
If using natural peanut butter, stir it thoroughly before measuring so the oil is evenly incorporated.
For the best texture, use old-fashioned rolled oats. Quick oats can also work and will create a softer texture.
Avoid using large, dry ingredients without enough moisture because they can make the bars difficult to hold together.
The chocolate topping is completely optional. The bars are delicious without it, but the topping gives them a more dessert-like finish.
Tips for Perfect Protein Bars
Use Creamy Peanut Butter
Creamy peanut butter creates the smoothest texture and helps bind all the ingredients together. Crunchy peanut butter works too if you enjoy extra texture.
Don’t Skip the Pressing Step
Firmly pressing the mixture into the pan is one of the most important steps. If the mixture is loosely packed, the bars may fall apart when sliced.
Use the bottom of a glass or measuring cup to compact the mixture evenly.
Adjust the Sweetness
The sweetness can be customized according to your taste.
If your protein powder is already sweetened, you may need less honey or maple syrup.
If you prefer a sweeter protein bar, add another tablespoon of honey or maple syrup.
Add Extra Chocolate
For an even richer chocolate flavor, add additional mini chocolate chips to the mixture.
You can also use chopped dark chocolate instead.
Make Them Nutty
Chopped almonds, walnuts, pecans, or peanuts add crunch and additional flavor.
For a peanut butter lover’s version, sprinkle chopped roasted peanuts over the chocolate topping before it sets.
Make Them Coconut Chocolate Peanut Butter Bars
Add 1/3 cup unsweetened shredded coconut to the mixture.
The coconut pairs beautifully with chocolate and peanut butter.
Use Different Protein Powder
Chocolate protein powder gives these bars their classic chocolate flavor, but vanilla protein powder can also work.
If using vanilla protein powder, increase the cocoa powder slightly if you want a stronger chocolate taste.
Let Them Chill Properly
The bars become firmer as they chill. Don’t slice them immediately after mixing.
Giving them enough refrigerator time makes them easier to cut and improves their texture.
## Serving Suggestions
Enjoy one bar with coffee or tea for an afternoon snack.
They are also convenient before or after a workout, depending on your individual nutrition needs.
For breakfast, serve a protein bar with Greek yogurt and fresh berries.
For dessert, warm one very briefly and serve with a spoonful of Greek yogurt or sliced banana.
You can also crumble a bar over yogurt to create a quick chocolate peanut butter parfait.
Storage
Store the bars in an airtight container in the refrigerator for up to 7 days.
Place parchment paper between layers if stacking them.
For longer storage, freeze the bars individually.
Wrap each bar in parchment paper or plastic wrap and place them in a freezer-safe container or bag.
Frozen bars can generally be stored for up to 2–3 months for best quality.
Thaw one in the refrigerator overnight or let it sit at room temperature for a short time before eating.
Make-Ahead Instructions
These bars are excellent for meal prep.
Prepare a batch on the weekend, chill them completely, slice them, and store them individually.
You can then grab one whenever you need a convenient snack.
For busy mornings, keep a few bars in the refrigerator and freeze the rest.
This makes it easy to have a homemade protein snack available throughout the week.
Variations
Almond Butter Chocolate Protein Bars
Replace peanut butter with almond butter for a slightly different flavor.
Chocolate Hazelnut Protein Bars
Add 2–3 tablespoons chopped roasted hazelnuts and use a chocolate-hazelnut-style topping.
Peanut Butter Banana Bars
Add 2 tablespoons mashed banana to the mixture and reduce the milk slightly if necessary.
Mocha Protein Bars
Add 1 teaspoon instant espresso powder to the dry ingredients for a delicious chocolate-coffee flavor.
Chocolate Coconut Bars
Add shredded coconut and top with melted dark chocolate.
Extra Crunchy Protein Bars
Add chopped peanuts, almonds, or cacao nibs for more texture.
Nutritional Information
Approximate nutrition per bar, based on 8 servings and depending on the specific protein powder, peanut butter, milk, sweetener, and chocolate used:
Calories: Approximately 330–360
Protein: Approximately 17–20 g
Carbohydrates: Approximately 30–35 g
Fat: Approximately 17–20 g
Fiber: Approximately 5–7 g
Sugar: Approximately 12–16 g
Sodium: Approximately 150–220 mg
Nutrition will vary between brands and ingredient choices. Using a low-sugar protein powder and unsweetened peanut butter can reduce the overall sugar content.
Benefits
High in Protein
Each bar provides more than 17 grams of protein when prepared with a typical protein powder, making it a convenient way to add protein to your day.
Protein contributes to the maintenance and growth of muscle and also helps make snacks more satisfying.
Convenient and Portable
Because these bars require no baking, they’re especially useful for meal prep.
Once chilled and sliced, they can be stored individually for quick snacks.
Oats Provide Fiber
Rolled oats provide carbohydrates and dietary fiber, which can contribute to a satisfying snack.
### Peanut Butter Adds Healthy Fats
Peanut butter contributes protein and unsaturated fats, along with a rich nutty flavor.
Chocolate Makes Healthy Eating More Enjoyable
A nutritious snack doesn’t have to taste boring. The combination of cocoa, peanut butter, and a little sweetness creates a dessert-inspired flavor that can make homemade snacks much more enjoyable.
Frequently Asked Questions
Can I make these protein bars without protein powder?
Yes, but the protein content will be significantly lower. Protein powder helps provide the high-protein nutrition profile and contributes to the structure of the bars.
Why are my protein bars falling apart?
The mixture may be too dry or wasn’t pressed firmly enough into the pan.
Try adding 1 tablespoon of milk at a time and mixing well. Then firmly compress the mixture into the pan before chilling.
Can I use quick oats?
Yes. Quick oats can be used, although they create a softer and more compact texture than old-fashioned rolled oats.
### Can I use maple syrup instead of honey?
Absolutely. Maple syrup works well as a sweetener and binder.
### Can I make these bars dairy-free?
Yes. Choose a dairy-free protein powder and use plant-based milk. Also check the chocolate chips to ensure they are dairy-free.
Can I make them gluten-free?
Yes. Use certified gluten-free oats and make sure your protein powder and other ingredients are certified gluten-free if necessary.
How long do they last?
They can be refrigerated in an airtight container for about 7 days. They can also be frozen for longer storage.
Can I freeze them?
Yes. Wrap the bars individually and store them in a freezer-safe container for up to 2–3 months for best quality.
Can I make smaller bars?
Definitely. Instead of cutting the mixture into 8 large bars, divide it into 10–12 smaller portions. This is a great option if you prefer smaller snacks.
### Do I have to add the chocolate topping?
No. The topping is optional. The bars are delicious on their own, but the chocolate topping adds an extra layer of richness.
Final Thoughts
These Chocolate Peanut Butter Protein Bars are proof that an easy homemade snack can be both satisfying and delicious. There is no baking, no complicated equipment, and no long preparation process.
With a rich chocolate flavor, creamy peanut butter, chewy oats, and more than 17 grams of protein per serving, they’re an excellent addition to your weekly meal-prep routine.
Make a batch, chill them, slice them, and keep them ready in the refrigerator whenever a chocolate-peanut-butter craving hits. ~~~