
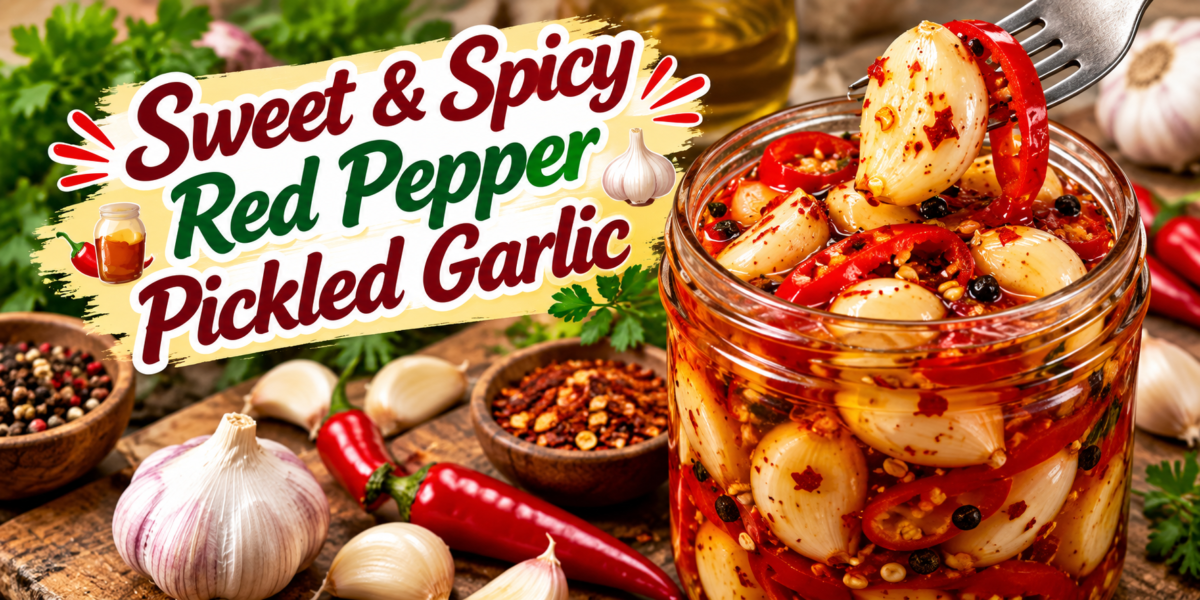
Sweet & Spicy Red Pepper Pickled Garlic
Pickled Garlic is a sweet, tangy, crunchy, and spicy refrigerator condiment made with fresh garlic cloves, red peppers, vinegar, sugar, and simple seasonings. The garlic becomes flavorful and tender while keeping a pleasant bite.
This Pickled Garlic recipe is inspired by the sweet-and-spicy garlic shown in your reference image. It is delicious straight from the refrigerator and works beautifully with sandwiches, salads, grilled meats, cheese boards, burgers, wraps, and rice bowls.
The combination of vinegar and sugar creates a balanced sweet-and-sour flavor. Red pepper adds warmth without overpowering the garlic, while a few simple spices give the brine extra depth.
Because this is a refrigerator pickle, it should be kept refrigerated rather than treated as a shelf-stable canned product. Properly acidified pickled foods can be stored safely in the refrigerator, while shelf-stable preservation requires a tested canning recipe and process.
Prep Time: 15 minutes
Cook Time: 5 minutes
Pickling Time: 24 hours
Total Time: About 25 minutes plus chilling
Ingredients
For the Pickled Garlic
2 cups fresh garlic cloves, peeled
1 cup white vinegar, preferably 5% acidity
1/2 cup water
1/3 cup granulated sugar
1 teaspoon salt
1/2 cup thinly sliced red chili peppers or red bell peppers
1 teaspoon black peppercorns
1/2 teaspoon red pepper flakes
1 teaspoon mustard seeds
1/2 teaspoon dried oregano
1 bay leaf
1/2 teaspoon smoked paprika
Optional Additions
1 tablespoon honey for a softer sweetness
1/2 teaspoon chili flakes for extra heat
2 tablespoons sliced jalapeños
1 small strip of lemon peel
1 tablespoon fresh parsley for serving
Step-by-Step Instructions
Prepare the Garlic
Start by separating the garlic cloves from the bulb.
Remove the loose outer skin.
Peel each clove carefully and trim away any damaged areas.
Wash the cloves briefly under cool running water and dry them thoroughly.
For larger cloves, you can leave them whole. Smaller cloves can also remain whole because they will absorb the pickling liquid gradually.
Fresh garlic gives Pickled Garlic its best flavor and texture, so choose firm cloves without soft spots, mold, or bruising.
Prepare the Red Peppers
Wash the red peppers and remove the stems.
Slice them into thin rings.
If you prefer a milder pickle, remove most of the seeds.
Keep some seeds if you enjoy a stronger spicy flavor.
The red peppers add beautiful color and create the sweet-and-spicy character of the finished Pickled Garlic.
Make the Pickling Liquid
Place the white vinegar, water, sugar, and salt in a small saucepan.
Add the black peppercorns, mustard seeds, red pepper flakes, oregano, smoked paprika, and bay leaf.
Stir the mixture gently.
Bring it to a gentle simmer over medium heat.
Continue heating until the sugar and salt dissolve completely.
Do not boil the mixture aggressively for a long time.
The goal is simply to create a hot, well-mixed brine.
A vinegar-based brine is an important part of pickling because acidification lowers the pH of the food. Research-based guidance emphasizes using appropriate acid levels for safe preservation.
Add the Garlic
Add the peeled garlic cloves to the warm pickling liquid.
Let them simmer gently for about 2 minutes.
Do not cook the garlic until completely soft.
A short heating time helps take away some of the raw sharpness while keeping the cloves pleasantly firm.
Add the sliced red peppers during the final minute.
Turn off the heat.
The garlic should still have some texture because it will continue absorbing flavor while it chills.
This quick step gives Pickled Garlic a balanced texture instead of making the cloves mushy.
Fill the Jar
Use a clean glass jar with a tight-fitting lid.
Carefully transfer the garlic and peppers into the jar.
Pour the warm pickling liquid over the garlic until the cloves are completely covered.
Leave a little space at the top of the jar.
Make sure there are no large air pockets trapped between the garlic cloves.
Allow the jar to cool briefly.
Close the lid securely.
Place the jar in the refrigerator once it has cooled.
For refrigerator pickles, clean jars and utensils help reduce the risk of contamination because the filled jars are not being processed as shelf-stable canned foods.
Let the Flavors Develop
For the best flavor, let the Pickled Garlic chill for at least 24 hours before serving.
The garlic will gradually absorb the vinegar, sugar, pepper, and herbs.
After 24 hours, the flavor will be tangy, slightly sweet, savory, and spicy.
After several days, the flavor becomes even more developed.
Always use a clean utensil when removing garlic from the jar.
Tips for the Best Pickled Garlic
Choose firm, fresh garlic cloves.
Avoid cloves with mold, soft areas, or visible damage.
Use vinegar with a clearly stated acidity, preferably 5% acidity, rather than an unknown homemade vinegar.
Keep the garlic completely covered by the pickling liquid.
Do not add fresh oil to the jar.
Store the finished pickle in the refrigerator.
Use a clean fork or spoon each time you remove garlic.
If you want more heat, increase the red pepper flakes or add sliced chili peppers.
For a sweeter flavor, slightly increase the sugar.
A little honey can also be added for flavor, although sugar is not the food-safety component of the pickle.
How to Serve Pickled Garlic
There are many delicious ways to enjoy this recipe.
Serve Pickled Garlic directly from the refrigerator as a snack.
Add chopped cloves to sandwiches for a sharp, tangy bite.
Mix sliced garlic into green salads.
Serve it alongside grilled chicken or steak.
Add it to burgers and wraps.
Place it on a Mediterranean-style cheese board with olives, feta, and fresh vegetables.
Chop the cloves and stir them into hummus.
Add them to grain bowls with rice, quinoa, cucumber, and tomatoes.
The sweet-and-spicy flavor also works well with roasted vegetables.
Flavor Variations
Extra Spicy
For a hotter version, use fresh red chilies and increase the red pepper flakes.
Mild and Sweet
Remove most of the pepper seeds and add a little extra sugar.
Mediterranean Style
Add oregano, thyme, lemon peel, and a few black peppercorns.
Smoky Version
Increase the smoked paprika slightly.
Honey Garlic Pickle
Add a small amount of honey after removing the brine from the heat.
These variations allow you to create different versions of Pickled Garlic without changing the basic method.
Storage Instructions
Keep the finished jar refrigerated at 40°F (4°C) or below.
This recipe is intended as a refrigerator pickle, not a shelf-stable canned product. Refrigerator pickles are specifically different from properly processed canned pickles.
Do not store the jar at room temperature.
Do not place the jar in a pantry or cupboard.
Keep the garlic covered with the brine.
Always use clean utensils when serving.
If you notice mold, unusual bubbling, an off smell, leaking, or another unexpected change, discard the product without tasting it. USDA guidance also recommends avoiding questionable foods rather than tasting them to determine safety.
For this homemade version, making smaller batches is a practical way to maintain quality.
Important Food Safety Note
Garlic preservation needs extra care because garlic is a low-acid vegetable. Vinegar-based pickling can make foods safer by lowering their pH, but safe shelf-stable canning requires a research-tested recipe and processing method.
This recipe is therefore written as a refrigerator pickle.
Do not leave the finished jar sitting on the counter for extended periods.
Do not add oil to the jar for storage. USDA specifically warns about the risks associated with garlic stored in oil at room temperature
If you want to make a shelf-stable canned product, use a tested preservation recipe from a recognized food-preservation authority rather than adapting a refrigerator recipe.
Frequently Asked Questions
How long does Pickled Garlic need before eating?
You can taste it after about 24 hours. The flavor becomes stronger as the garlic continues to sit in the brine.
Does Pickled Garlic need to be refrigerated?
Yes. This recipe is designed specifically for refrigerator storage.
Can I use apple cider vinegar?
You can use it for flavor if it has the appropriate labeled acidity, but white vinegar provides a cleaner color and sharper traditional pickle flavor.
Can I make the garlic less spicy?
Yes. Reduce the red pepper flakes and remove the seeds from the fresh peppers.
Can I make it sweeter?
Yes. Add a little more sugar according to your taste.
Can I use peeled store-bought garlic?
Yes, provided the garlic is fresh and in good condition.
Why does the garlic change color?
Garlic can sometimes develop a blue or green tint during pickling because of natural compounds reacting to acidity. Color changes can occur during pickling and do not automatically mean spoilage, but always discard food showing mold, unusual odors, or other signs of spoilage.
Can I use Pickled Garlic in salads?
Absolutely. Chop the cloves finely and mix them with lettuce, tomatoes, cucumber, olives, and feta.
Can I serve it with grilled meat?
Yes. The tangy flavor works particularly well alongside grilled chicken, beef, lamb, or vegetables.
Can I add onions?
Yes. Thinly sliced red onions can be added to the jar for extra sweetness and crunch.
Nutrition Information
Approximate nutrition per serving:
Calories: 45 kcal
Protein: 1g
Carbohydrates: 9g
Fat: 0g
Fiber: 1g
Sugar: 7g
Sodium: 190mg
Nutrition values are estimates and can vary depending on the exact amount of sugar, garlic, vinegar, and peppers used.
Why You Will Love This Recipe
Pickled Garlic is one of those simple homemade condiments that can transform everyday meals.
The cloves are tangy from vinegar, slightly sweet from sugar, and spicy from red peppers.
They add a powerful flavor without requiring a complicated cooking process.
The recipe is also flexible. You can adjust the sweetness and heat according to your preference.
Another advantage is that the garlic can be prepared ahead of time. Once it has chilled and absorbed the brine, you can add it to meals whenever you need an extra burst of flavor.
The combination of garlic and red pepper is especially good with rich foods because the acidity helps provide contrast.
Try it with grilled meats, creamy dips, sandwiches, roasted vegetables, or a simple salad.
Final Thoughts
Sweet and Spicy Pickled Garlic is a flavorful refrigerator condiment that combines fresh garlic, vinegar, sweetness, red peppers, and aromatic spices.
The preparation is straightforward. Prepare the garlic, make the brine, warm the cloves briefly, transfer everything to a clean jar, and refrigerate.
After the garlic rests, the cloves develop a delicious combination of tangy, sweet, savory, and spicy flavors.
This Pickled Garlic can become a useful addition to your refrigerator because a small amount can add plenty of character to everyday meals.
Use it on sandwiches, salads, burgers, rice bowls, grilled meats, cheese boards, or simply enjoy a chilled clove when you want a bold snack.
For best results, remember that this is a refrigerator recipe rather than a shelf-stable canning recipe. Keep it cold, use clean utensils, and discard it if you notice signs of spoilage.
With its bright red peppers, tender garlic cloves, and flavorful vinegar brine, this Pickled Garlic is an easy homemade condiment that brings a sweet and spicy kick to almost any meal.