
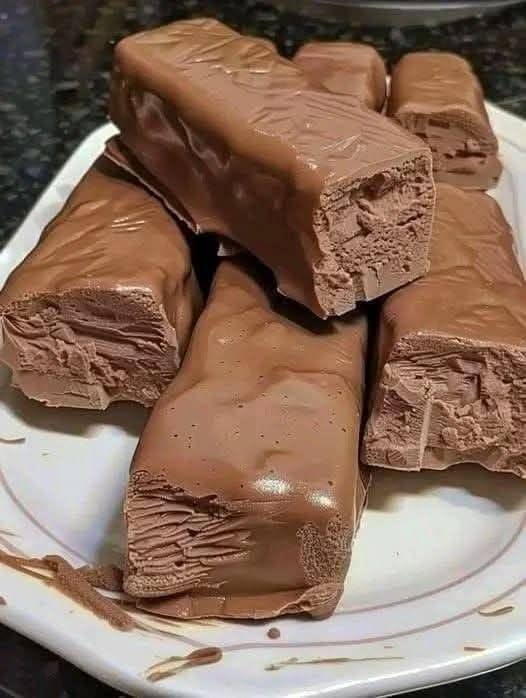
Homemade Chocolate Ice Cream Bars
These Homemade Chocolate Ice Cream Bars are rich, creamy, and coated in a smooth chocolate shell that melts in your mouth. Made with simple ingredients, they’re the perfect frozen dessert for hot summer days or whenever you’re craving a chocolatey treat. The creamy filling is whipped until light and fluffy before being frozen into bars, then dipped in a crisp chocolate coating for that classic ice cream bar experience. They’re easy to customize with nuts, sprinkles, or caramel drizzle and taste even better than store-bought versions.
Ingredients
For the Ice Cream Filling
- 2 cups (480ml) heavy whipping cream, cold
- 1 (14 oz) can sweetened condensed milk
- ½ cup unsweetened cocoa powder
- 1 teaspoon vanilla extract
- ¼ teaspoon salt
For the Chocolate Coating
- 2 cups milk chocolate chips
- 2 tablespoons coconut oil (or vegetable oil)
Optional Toppings
- Chopped roasted almonds
- Mini chocolate chips
- Crushed cookies
- Sprinkles
- Caramel drizzle
Instructions
- Line an 8-inch square baking pan or loaf pan with parchment paper, leaving extra paper hanging over the sides.
- In a large mixing bowl, beat the cold heavy cream until stiff peaks form.
- In another bowl, whisk together the sweetened condensed milk, cocoa powder, vanilla extract, and salt until smooth.
- Gently fold the chocolate mixture into the whipped cream until fully combined and light in texture. Avoid overmixing.
- Pour the mixture into the prepared pan and spread evenly with a spatula.
- Cover with plastic wrap and freeze for at least 6 hours, preferably overnight.
- Once frozen solid, lift the ice cream out using the parchment paper and cut into 8 equal bars.
- Insert wooden popsicle sticks into each bar and place them on a tray lined with parchment paper. Freeze for another 30 minutes.
- In a microwave-safe bowl, melt the chocolate chips with the coconut oil in 20-second intervals, stirring until smooth.
- Let the chocolate cool for 5 minutes so it isn’t too hot.
- Dip each frozen bar into the melted chocolate, allowing the excess to drip off. The chocolate will harden within seconds.
- Immediately sprinkle with chopped nuts or other toppings if desired.
- Return the bars to the freezer for 10–15 minutes before serving.
Tips, Notes & Q&A
Why add coconut oil?
It helps create a thin, crisp chocolate shell that hardens quickly and gives the bars a professional finish.
Can I use dark chocolate?
Absolutely. Dark or semi-sweet chocolate creates a richer, less sweet coating.
How long do they keep?
Store in an airtight freezer-safe container with parchment paper between layers for up to 2 months.
Can I make different flavors?
Yes! Replace the cocoa powder with vanilla, strawberry puree, peanut butter, or crushed cookies to create different ice cream flavors.
How do I keep the bars from melting while dipping?
Work with one bar at a time and keep the remaining bars in the freezer until ready to coat.
Servings & Nutrition
Servings: 8 ice cream bars
Approximate Nutrition (Per Bar)
- Calories: 390
- Protein: 5g
- Carbohydrates: 29g
- Fat: 30g
- Saturated Fat: 18g
- Sugar: 25g
- Fiber: 2g
- Sodium: 85mg
These homemade chocolate ice cream bars are irresistibly creamy with a rich chocolate flavor and a crisp chocolate coating. They’re perfect for family gatherings, summer parties, or simply keeping in the freezer for a delicious homemade dessert whenever the craving strikes.