
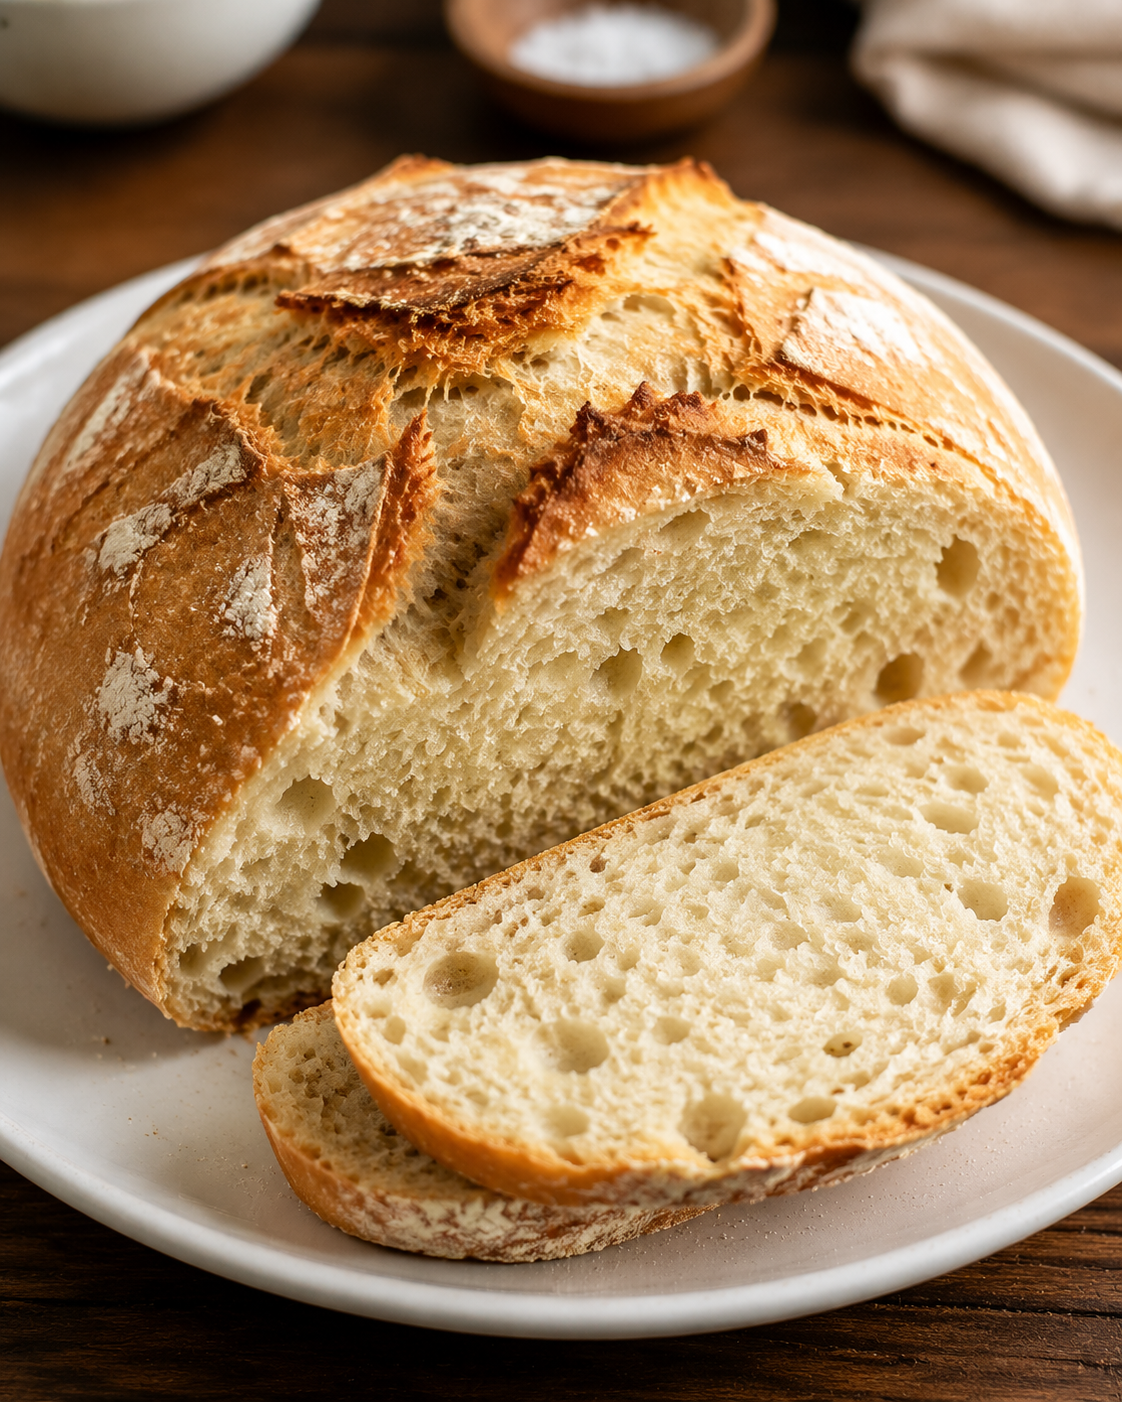
No Kneading, No Eggs, No Butter Bread – Easy Homemade Rustic Bread
Description
No Kneading, No Eggs, No Butter Bread is the perfect homemade bread recipe for anyone who wants fresh, bakery-style bread without complicated techniques or special equipment. This simple recipe creates a beautifully golden crust with a soft, airy interior using only basic pantry ingredients.
Unlike traditional bread recipes that require kneading, eggs, or butter, this version relies on time and simple mixing to develop flavour and texture. The long resting period allows the yeast to naturally create a light and chewy structure while keeping the process effortless.
This rustic homemade bread is perfect for breakfast, sandwiches, toast, dipping into soups, or serving alongside family meals. It has a crisp crust, tender crumb, and classic homemade flavour that tastes like it came from a bakery.
Whether you are a beginner baker or simply want an easy bread recipe with minimal effort, this no-knead bread is a must-try.
Prep Time: 10 minutes
Resting Time: 2–3 hours
Bake Time: 40–45 minutes
Total Time: About 3 hours
Servings: 10 slices
Ingredients
For the Bread Dough:
- 3 cups all-purpose flour (360g)
- 1½ teaspoons salt
- 1 teaspoon sugar or honey
- 2 teaspoons instant yeast
- 1½ cups warm water (around 100–110°F)
- 1 tablespoon olive oil (optional)
Optional Additions:
- 1 teaspoon dried rosemary
- 1 teaspoon garlic powder
- 2 tablespoons sunflower seeds
- 2 tablespoons sesame seeds
- ¼ cup shredded cheese
- Mixed herbs
Instructions
Step 1: Activate the Yeast
In a large mixing bowl, add warm water, sugar, and yeast.
Stir gently and let it sit for 5–10 minutes until slightly foamy.
This step helps ensure the yeast is active and ready to create a fluffy bread texture.
Step 2: Mix the Dough
Add flour and salt to the yeast mixture.
Using a wooden spoon or spatula, mix until everything combines into a sticky dough.
The dough does not need to be smooth. A slightly sticky texture is normal for no-knead bread.
Add olive oil if using and mix again.
Step 3: Let the Dough Rise
Cover the bowl with plastic wrap or a clean kitchen towel.
Allow the dough to rest in a warm place for 2–3 hours until it doubles in size.
During this time, the yeast creates air pockets that give the bread its soft texture.
Step 4: Shape the Dough
Once risen, lightly flour your work surface.
Transfer the dough onto the surface and gently shape it into a round loaf.
Do not knead the dough. Handle it gently to keep the air inside.
Step 5: Second Rest
Place the shaped dough on parchment paper.
Cover and allow it to rest for another 20–30 minutes.
This helps create a lighter texture.
Step 6: Bake the Bread
Preheat oven to 425°F (220°C).
Place the dough into a preheated Dutch oven or baking dish if available.
Make a few shallow cuts on top of the dough with a sharp knife.
Bake covered for 25–30 minutes.
Remove the cover and bake another 10–15 minutes until the crust becomes golden brown.
Step 7: Cool Before Slicing
Remove bread from the oven and allow it to cool for at least 30 minutes before slicing.
Cooling allows the inside structure to finish setting and prevents a gummy texture.
Tips & Notes
1. Do Not Add Too Much Flour
No-knead dough should be slightly sticky. Adding too much flour can make the bread dense.
2. Use Warm Water
Water that is too hot can damage yeast, while cold water slows down rising.
3. Give Enough Rising Time
The resting period develops flavour and creates a soft, airy crumb.
4. Bake at High Heat
A hot oven helps create a beautiful golden crust.
5. Use a Dutch Oven for Best Results
A covered baking pot traps steam, creating a bakery-style crispy crust.
6. Add Flavors
Customise your bread with the following:
- Garlic and herbs
- Cheese
- Olives
- Seeds
- Dried fruits
7. Storage Instructions
Store cooled bread in an airtight container or bread bag for up to 3 days.
For longer storage, freeze slices for up to 3 months.
Serving Ideas
Breakfast
Serve toasted slices with:
- Avocado
- Eggs
- Peanut butter
- Jam
- Greek yogurt
Lunch
Use it for:
- Sandwiches
- Toasted melts
- Bruschetta
Dinner
Serve alongside:
- Soups
- Salads
- Pasta dishes
- Roasted vegetables
Snack
Enjoy with:
- Olive oil dip
- Hummus
- Cheese spreads
Recipe Variations
Whole Wheat No-Knead Bread
Replace half of the flour with whole wheat flour for extra fibre.
Garlic Herb Bread
Add garlic powder, rosemary, and oregano for a flavourful loaf.
Seeded Bread
Add sunflower seeds, pumpkin seeds, or sesame seeds for crunch.
Cheesy Bread
Mix shredded cheese into the dough before resting.
Sweet Breakfast Bread
Add cinnamon and raisins for a lightly sweet version.
Benefits of No Kneading, No Eggs, No Butter Bread
1. Simple Ingredients
This recipe uses basic pantry ingredients without unnecessary additives.
2. Lower in Saturated Fat
Since it contains no butter, it can be a lighter alternative to rich breads.
3. Egg-Free Option
Suitable for people avoiding eggs or looking for an egg-free homemade bread.
4. Provides Energy
Bread provides carbohydrates that fuel daily activities.
5. Homemade Control
Making bread at home allows you to control ingredients, salt, and additives.
6. Budget-Friendly
Simple ingredients make this an affordable homemade staple.
7. Versatile Meal Option
It can be used for breakfast, lunch, dinner, or snacks.
Recipe Notes
- Fresh yeast creates the best rise and texture.
- Measure flour carefully because too much flour makes bread heavy.
- Do not slice while hot because the inside may become sticky.
- If your kitchen is cold, allow extra rising time.
- For extra crispy crust, place a small oven-safe dish of hot water inside the oven while baking.
- Let leftover bread cool completely before storing.
Frequently Asked Questions (Q&A)
Q: Why is this bread called no-knead bread?
Because the dough does not require traditional kneading. Time allows gluten development naturally.
Q: Can I make this bread without yeast?
Yeast is responsible for the rise and airy texture. Without it, the texture will be different.
Q: Can I use whole wheat flour?
Yes, but the bread will be slightly denser. Mixing whole wheat and all-purpose flour gives better results.
Q: Why is my bread dense?
Common reasons include inactive yeast, insufficient rising time, or adding too much flour.
Q: Can I prepare the dough overnight?
Yes. Refrigerating the dough overnight can improve flavour. Let it come to room temperature before baking.
Q: Can I make this recipe gluten-free?
Yes, but you need a gluten-free flour blend designed for yeast bread.
Q: How do I get a crispy crust?
Bake at high heat and use steam from a covered pot or water tray.
Q: Can I freeze homemade bread?
Yes. Slice the bread before freezing for easy use.
Servings & Nutritional Information (Approximate Per Slice)
Servings: 10 slices
Calories: 150 kcal
Protein: 5g
Carbohydrates: 30g
Fiber: 1g
Fat: 1g
Sugar: 1g
Calcium: 10mg
Iron: 2mg
(Nutrition values may vary depending on flour type and optional ingredients.)
Final Thoughts
No Kneading, No Eggs, No Butter Bread is proof that homemade bread does not have to be difficult. With simple ingredients, minimal effort, and a little patience, you can create a beautiful rustic loaf with a crispy crust and soft interior.