
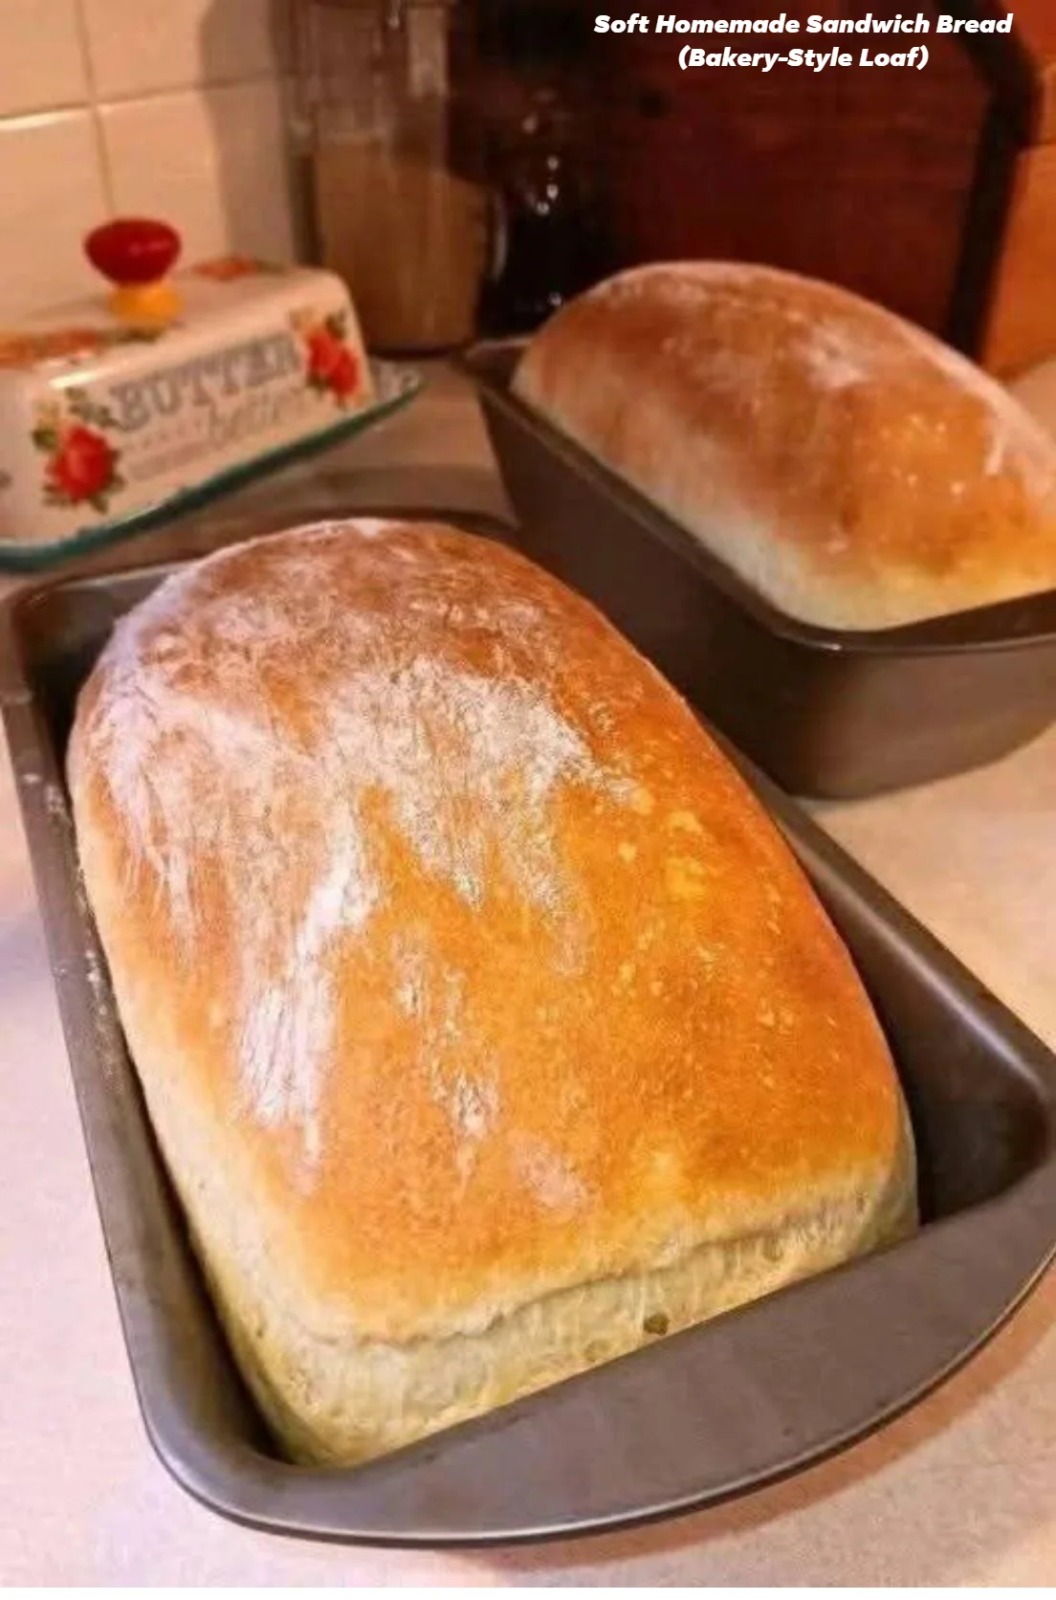
Easiest Homemade Sandwich Bread
There is nothing quite like the smell of freshly baked bread filling the kitchen. This Easiest Homemade Sandwich Bread is soft, tender, lightly chewy, and perfect for everything from morning toast to hearty sandwiches. It uses simple pantry ingredients and requires no eggs or butter in the dough, making it an affordable and reliable homemade loaf.
The dough comes together with flour, warm water, yeast, sugar, and salt. After a little kneading and rising time, it bakes into a beautifully golden loaf with a soft interior and a delicate crust. You can keep the crust rustic with a light dusting of flour or brush the warm loaf with melted butter for an especially soft finish.
Prep Time: 20 minutes
Rise Time: 1 hour 15 minutes to 1 hour 30 minutes
Cook Time: 30–35 minutes
Total Time: About 2 hours 10 minutes
Servings: 1 large loaf, about 10–12 slices
Difficulty: Easy
Best For: Sandwiches, toast, breakfast, lunch boxes, and snacks
Ingredients
Main Ingredients
3 ½ cups (440g) all-purpose flour or bread flour
1 ½ cups (360ml) warm water, ideally 105°F–110°F
2 ¼ teaspoons instant yeast, or 1 standard packet
2 teaspoons granulated sugar
1 ½ teaspoons salt
Optional Finishes
A light dusting of flour for the top
Melted butter or olive oil for brushing the warm crust
Instructions
Prepare the Yeast Mixture
Pour the warm water into a large mixing bowl. Add the sugar and instant yeast and stir gently. Let the mixture stand for about 3–5 minutes. Instant yeast does not always need proofing, but this short rest helps distribute the yeast evenly.
Make sure the water is warm rather than hot. Water that is too hot can damage the yeast and prevent the bread from rising properly.
Make the Dough
Add about 3 cups of the flour and the salt to the bowl. Stir with a wooden spoon or sturdy spatula until a rough dough begins to form.
Add the remaining flour gradually. You may not need every last tablespoon, depending on the flour and humidity in your kitchen. The finished dough should be soft and slightly tacky but not wet or excessively sticky.
Knead the Dough
Transfer the dough to a lightly floured work surface. Knead for about 7–10 minutes by hand, pushing the dough forward with the heel of your hand, folding it back, and turning it as you work.
The dough should gradually become smoother, more elastic, and easier to handle. If it feels extremely sticky, add flour only 1 tablespoon at a time. Avoid adding too much flour because a very stiff dough can produce a dense loaf.
You can also use a stand mixer fitted with a dough hook. Knead on low to medium-low speed for approximately 5–7 minutes, until the dough is smooth and elastic.
Let the Dough Rise
Place the kneaded dough into a lightly greased bowl. Turn it once so the surface is lightly coated with oil.
Cover the bowl with plastic wrap, a clean kitchen towel, or a reusable cover. Place it somewhere warm and allow the dough to rise for about 60–75 minutes, or until it has approximately doubled in size.
The exact rising time depends on the temperature of your kitchen. In a warm environment, the dough may rise faster, while a cool kitchen can require additional time.
Shape the Loaf
Once the dough has doubled, gently press it down to release excess air.
Transfer it to a lightly floured surface and shape it into a rectangle roughly the length of your loaf pan. Roll the dough tightly from one short end to the other, pinching the seam closed as you go.
Place the shaped dough seam-side down into a greased 9 x 5-inch loaf pan. Gently press the dough so it sits evenly in the pan.
Complete the Second Rise
Cover the loaf loosely and allow it to rise again for approximately 30–45 minutes.
The dough should become noticeably puffy and rise close to the rim of the pan. Do not let it overproof until it collapses or becomes extremely loose.
While the dough is finishing its second rise, preheat your oven to 375°F (190°C).
Prepare the Top
For a rustic bakery-style appearance, lightly dust the top of the risen loaf with flour.
You can also leave it plain for a smooth golden crust. If you prefer a softer crust, you can brush the finished loaf with melted butter or olive oil immediately after baking instead.
Bake the Bread
Place the loaf in the preheated oven and bake for approximately 30–35 minutes, or until the top is golden brown and the loaf sounds hollow when gently tapped.
If the top begins browning too quickly, loosely cover it with aluminum foil during the final portion of baking.
For the most reliable result, the center of the loaf should reach approximately 190°F–200°F (88°C–93°C).
Cool Before Slicing
Remove the bread from the pan and place it on a wire rack.
For a softer crust, brush the warm loaf lightly with melted butter or olive oil.
Allow the bread to cool for at least 45–60 minutes before slicing. Cutting into very hot bread can compress the soft interior and make it appear gummy.
Once cooled, slice with a serrated bread knife for neat, even pieces.
Tips
Use the correct water temperature: The water should feel comfortably warm, around 105°F–110°F. Very hot water can interfere with yeast activity.
Measure flour carefully: Too much flour is one of the most common reasons homemade bread turns out heavy. If possible, use a kitchen scale. The recipe calls for approximately 440g.
Do not rush the rising process: The dough needs enough time to develop structure and become airy. Rising time will vary depending on room temperature.
Keep the dough soft: A slightly tacky dough generally produces a softer sandwich loaf. Resist adding large amounts of flour while kneading.
Knead until elastic: Properly kneaded dough should stretch without immediately tearing. This helps develop gluten and gives the loaf its characteristic structure.
Watch the second rise: The dough should become puffy but should not rise excessively. Overproofed dough can collapse during baking.
Use a loaf pan: A 9 x 5-inch pan gives this recipe a classic sandwich-bread shape and makes the slices ideal for sandwiches.
Cool completely: Although the aroma may make it tempting to cut immediately, cooling allows the interior to finish setting.
For an extra-soft crust: Brush the loaf with melted butter immediately after removing it from the oven.
For a crispier crust: Skip the butter or oil and allow the bread to cool naturally on a wire rack.
Variations
Honey Sandwich Bread: Replace the granulated sugar with 2 teaspoons of honey. This gives the loaf a subtle natural sweetness.
Whole Wheat Version: Replace up to 1 ½ cups of the all-purpose flour with whole wheat flour. You may need a small additional splash of water because whole wheat flour absorbs more liquid.
Herb Bread: Add 1 teaspoon of dried Italian herbs, oregano, or rosemary to the flour for a savory loaf.
Garlic Herb Bread: Add ½ teaspoon garlic powder and 1 teaspoon dried parsley or Italian seasoning to the dough.
Seeded Sandwich Bread: Sprinkle sesame seeds, sunflower seeds, pumpkin seeds, or flaxseeds over the top before baking. Lightly brush the surface with water first so the seeds adhere.
Cheesy Bread: Add ½ cup finely shredded cheddar, mozzarella, or Parmesan to the dough for a savory variation.
Milk Bread Style: Replace about ½ cup of the water with warm milk for a richer and softer crumb.
Cinnamon Toast Bread: Add 1 teaspoon cinnamon and increase the sugar slightly for a lightly sweet breakfast loaf.
Mini Loaves: Divide the dough into two smaller portions and bake in smaller loaf pans. Begin checking them earlier because smaller loaves require less baking time.
Storage and Serving Suggestions
Once completely cooled, store the bread in an airtight container or tightly wrapped at room temperature for up to 3 days. Avoid refrigerating homemade bread unless necessary because refrigeration can make bread stale more quickly.
For longer storage, slice the loaf and freeze the slices in a freezer-safe bag. Individual slices can be removed as needed and toasted directly from frozen.
This bread is excellent with butter, jam, honey, peanut butter, scrambled eggs, or avocado. It also makes a sturdy base for grilled cheese, turkey sandwiches, chicken sandwiches, tuna melts, and classic breakfast toast.
For the best sandwich texture, slice the bread about ½ inch thick. If you prefer substantial toast or hearty sandwiches, slightly thicker slices work beautifully.
Q&A
Can I use bread flour instead of all-purpose flour?
Yes. Bread flour works very well and can produce a slightly chewier loaf with stronger structure. All-purpose flour creates a softer, more tender sandwich bread.
Why didn’t my bread rise?
The yeast may have been inactive, the water may have been too hot or too cold, or the kitchen may have been too cool. Give the dough additional time in a warm, draft-free location before assuming it has failed.
Can I make this bread without a stand mixer?
Absolutely. This recipe is very easy to knead by hand. Knead the dough for approximately 7–10 minutes until smooth and elastic.
How do I know when the bread is fully baked?
The loaf should be golden brown and sound hollow when tapped. For the most accurate test, use an instant-read thermometer and look for an internal temperature around 190°F–200°F.
Why is my homemade bread dense?
Dense bread can result from adding too much flour, insufficient kneading, inactive yeast, or not allowing enough time for the dough to rise. Keep the dough relatively soft and give it adequate rising time.
Can I prepare the dough ahead of time?
Yes. You can prepare the dough, cover it tightly, and refrigerate it after kneading. Let it warm and complete its rise before shaping and baking. Because refrigeration slows yeast activity, the process will take longer.
Can I freeze homemade sandwich bread?
Yes. Once completely cooled, slice the bread and freeze it in an airtight freezer-safe bag. Freezing individual slices makes it easy to take out only what you need.
How can I make the crust softer?
Brush the hot loaf with melted butter or a little olive oil immediately after baking. Allowing the bread to cool under a clean kitchen towel can also help maintain a softer exterior.
Can I add seeds to the top?
Yes. Sesame, sunflower, pumpkin, flax, or everything-bagel seasoning can be sprinkled over the loaf before baking for extra texture and flavor.
How long should I let the bread cool?
Allow it to cool for at least 45–60 minutes before slicing. This gives the crumb time to set and prevents the inside from becoming gummy.
Nutrition
Approximate nutrition per slice, assuming the loaf is divided into 12 slices:
Calories: 165 kcal
Carbohydrates: 30 g
Protein: 5 g
Fat: 2 g
Saturated Fat: 0.3 g
Fiber: 1 g
Sugar: 2 g
Sodium: 290 mg
Nutrition values are estimates and will vary depending on the flour, yeast, toppings, slice size, and optional butter or oil used for finishing.
Conclusion
This Easiest Homemade Sandwich Bread is a simple recipe worth keeping in your regular baking rotation. With just a handful of basic ingredients, you can make a soft, flavorful loaf that is far more satisfying than store-bought bread.
The key is to keep the dough soft, knead it properly, allow both rises to happen fully, and give the finished loaf enough time to cool before slicing. Once you master the basic recipe, you can easily turn it into whole wheat, seeded, herb, cheesy, or lightly sweet breakfast bread.
Serve it fresh with butter and jam, use it for your favorite sandwiches, or toast it until golden and crisp. This homemade loaf is simple, versatile, and perfect for everyday baking.