
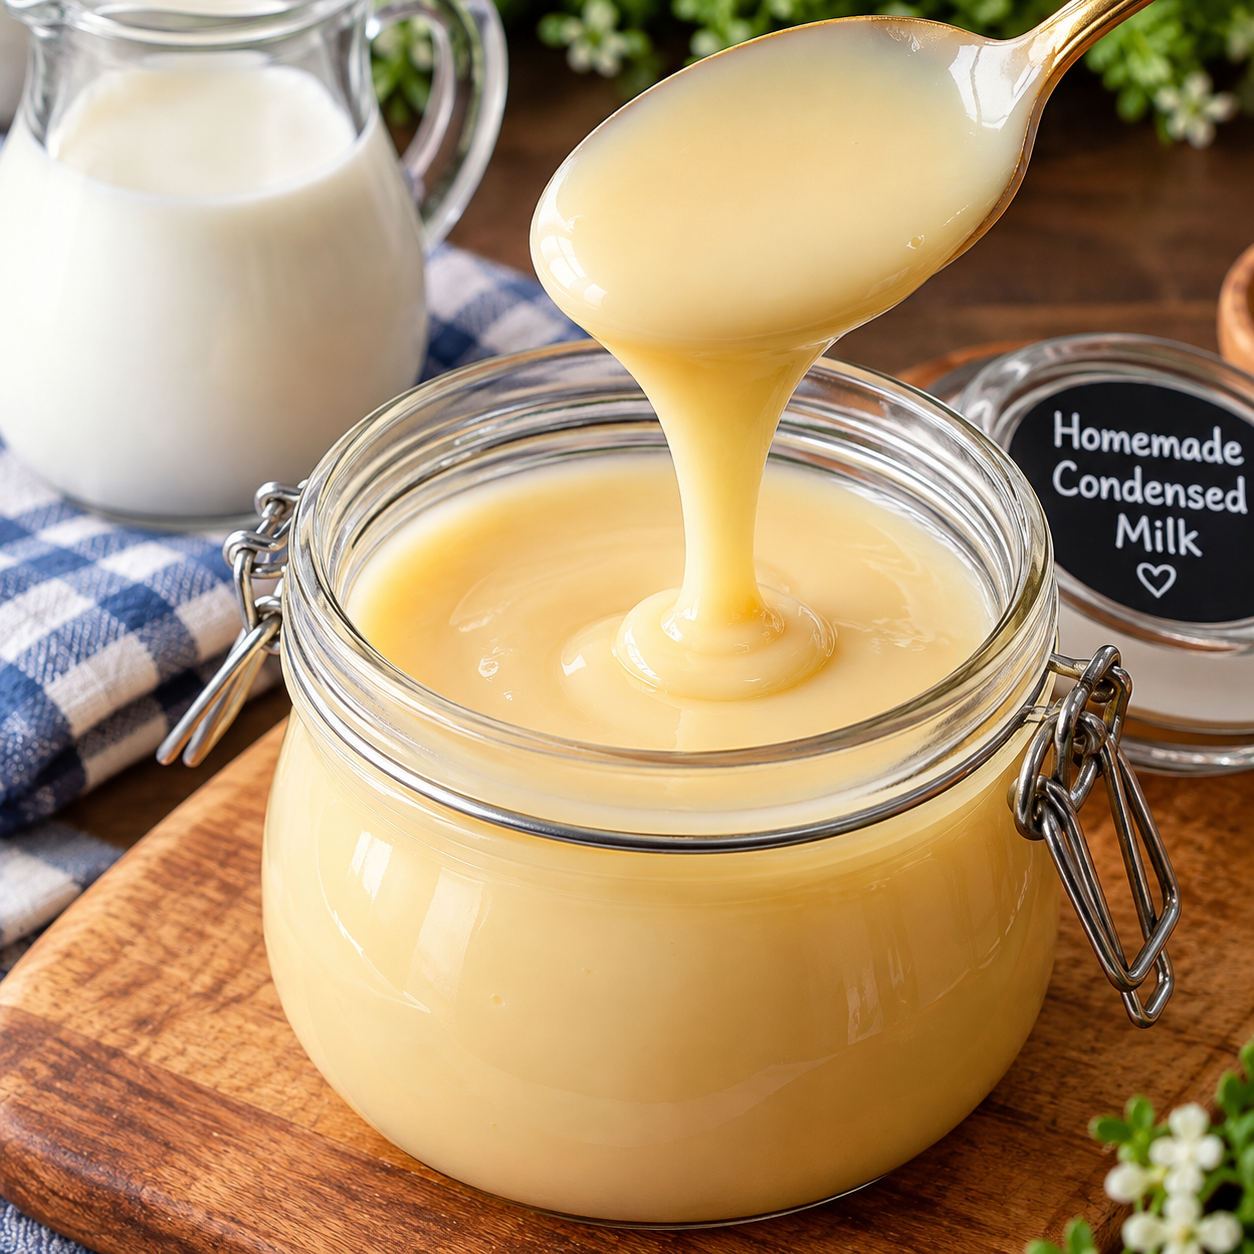
Homemade Condensed Milk
Description
Homemade condensed milk is a rich, creamy, sweet milk mixture that can be prepared with simple pantry ingredients. It has a smooth, velvety texture and a delicious milky flavour, making it perfect for desserts, cakes, puddings, ice cream, coffee, tea, and many other sweet recipes.
Traditional sweetened condensed milk is made by reducing milk and adding sugar until much of the water evaporates and the mixture becomes thick and creamy. Making it at home allows you to control the sweetness and ingredients while giving you a fresh alternative to store-bought condensed milk.
The key to a successful homemade version is gentle cooking. The milk should be reduced slowly rather than boiled aggressively. This allows the mixture to thicken gradually while developing a rich flavour and smooth consistency.
Ingredients
Main Ingredients
- 4 cups whole milk
- 1¼ cups granulated sugar
- 2 tablespoons unsalted butter
- 1 teaspoon vanilla extract
- Small pinch of salt
Optional Ingredients
- 2 tablespoons powdered milk for a richer milk flavour
- ½ teaspoon vanilla bean paste
- 1 tablespoon corn syrup or glucose syrup for an extra smooth texture
Instructions
Step 1: Choose the Right Pan
Use a wide, heavy-bottomed saucepan.
A wide pan helps more water evaporate from the milk, reducing the cooking time and making it easier to achieve the proper thick consistency.
Add the whole milk and sugar to the saucepan.
Place the pan over medium-low heat.
Step 2: Dissolve the Sugar
Stir the milk and sugar gently until the sugar has completely dissolved.
Do not allow the mixture to boil rapidly.
Once the sugar is dissolved, reduce the heat to low.
Step 3: Slowly Reduce the Milk
Allow the milk mixture to gently simmer for approximately:
45–60 minutes
Stir every few minutes, especially around the bottom and edges of the pan.
The mixture will gradually become thicker and slightly darker in colour.
Avoid high heat because milk can scorch easily.
The mixture should reduce significantly and become thick enough to coat the back of a spoon.
Step 4: Add Butter
Once the milk has reduced and become noticeably thick, add the butter.
Stir until completely melted and incorporated.
The butter adds richness and helps create a smooth, silky texture.
Step 5: Add Vanilla and Salt
Remove the saucepan from the heat.
Add vanilla extract and a tiny pinch of salt.
Stir well.
The small amount of salt balances the sweetness and enhances the creamy milk flavour.
Step 6: Add Optional Milk Powder
If using powdered milk, whisk it into the warm condensed milk until completely smooth.
If small lumps appear, use a whisk or strain the mixture through a fine-mesh sieve.
Step 7: Cool
Allow the condensed milk to cool at room temperature for approximately 20–30 minutes.
Remember that it will continue to thicken as it cools.
Do not judge the final consistency while it is still very hot.
Step 8: Transfer to a Jar
Pour the cooled condensed milk into a clean airtight glass jar.
Allow it to cool completely before sealing.
Refrigerate before using for the thickest consistency.
How to Know When It Is Ready
One of the most important parts of making homemade condensed milk is knowing when to stop cooking.
The mixture should:
- Look creamy and glossy
- Be noticeably thicker than regular milk
- Coat the back of a spoon
- Pour slowly rather than quickly
- Become thicker after cooling
Do not wait for it to become extremely thick while still on the stove. If you cook it until it looks like a very thick paste, it may become too thick once refrigerated.
Tips and Notes
Use Whole Milk
Whole milk provides the richest flavour and creamiest texture.
Lower-fat milk can work, but the final condensed milk may be thinner and less rich.
Keep the Heat Low
Gentle cooking is essential.
High heat can cause the milk to scorch or develop unwanted brown spots.
Stir Frequently
Pay particular attention to the bottom of the pan because milk solids can settle and burn.
Use a Wide Pan
A wide saucepan increases the surface area and allows water to evaporate efficiently.
Don’t Rush the Process
Homemade condensed milk requires patience.
Cooking it too quickly can affect both flavour and texture.
Remember, It Thickens While Cooling
The mixture should still be pourable when you remove it from the stove.
It becomes considerably thicker after cooling and refrigeration.
Strain for Extra Smoothness
If you notice tiny milk particles or lumps, strain the finished condensed milk through a fine-mesh sieve while warm.
Storage Instructions
Transfer the condensed milk to a clean airtight container.
Refrigerate for up to:
1 week
Always use a clean spoon when removing condensed milk from the jar.
For longer storage, homemade condensed milk can be frozen for approximately:
2–3 months
Freeze it in a freezer-safe container with a little room for expansion.
Thaw overnight in the refrigerator and stir well before using.
Ways to Use Homemade Condensed Milk
Homemade condensed milk is incredibly versatile.
Use it in:
- Tres leches cake
- No-bake cheesecake
- Ice cream
- Fudge
- Caramel desserts
- Fruit salads
- Rice pudding
- Coconut desserts
- Milkshakes
- Coffee
- Tea
- Hot chocolate
- Homemade candy
- Dessert sauces
- Creamy puddings
- Cakes and cupcakes
You can also drizzle a small amount over fresh fruit or use it as a sweet topping for pancakes and waffles.
Recipe Variations
Chocolate Condensed Milk
Add 2–3 tablespoons unsweetened cocoa powder during the cooking process.
Whisk thoroughly to prevent lumps.
Coconut Condensed Milk
Replace whole milk with full-fat coconut milk.
This creates a creamy tropical version that works beautifully in coconut desserts.
Coffee-Flavoured Condensed Milk
Add 1 teaspoon instant espresso powder for a subtle coffee flavour.
Cinnamon Condensed Milk
Add a small cinnamon stick while the milk reduces.
Remove it before cooling.
Vanilla Bean Condensed Milk
Add the seeds from one vanilla bean for an intense natural vanilla flavour.
Reduced-Sugar Version
You can reduce the amount of sugar, but remember that sugar contributes to both sweetness and texture. A significantly reduced-sugar version may not become as thick as traditional condensed milk.
Benefits
Fresh Homemade Ingredients
Making condensed milk yourself gives you control over the ingredients and allows you to avoid unnecessary additives that may be present in some packaged products.
Customisable Sweetness
You can adjust the amount of sugar according to your preference.
Rich Source of Energy
Milk and sugar provide carbohydrates and energy, making condensed milk a concentrated ingredient.
Calcium
Milk naturally contains calcium, which contributes to normal bone and teeth health.
Versatile Pantry Ingredient
A homemade batch can be used in many different desserts, making it a useful ingredient to keep refrigerated.
Convenient for Baking
Having homemade condensed milk ready can save time when preparing recipes that require it.
This is still a sweet, calorie-dense ingredient, so it is best enjoyed in moderate portions.
Q&A
Can I use low-fat milk?
Yes, but whole milk is recommended for the richest and creamiest result. Low-fat milk may produce a thinner consistency.
Why didn’t my condensed milk thicken?
It may need more reduction time. Continue cooking gently while stirring frequently.
Also remember that condensed milk becomes significantly thicker after cooling.
Why did my condensed milk become too thick?
It was probably cooked for too long. Add a small amount of warm milk and whisk until the desired consistency is reached.
Why does my milk have brown bits?
The milk may have scorched on the bottom of the pan. Remove it from the heat immediately and transfer the unburned mixture to another pan without scraping the bottom.
Can I make it without butter?
Yes. Butter is optional, although it contributes richness and a smoother mouthfeel.
Can I use honey instead of sugar?
Honey changes both the flavour and consistency, so it is not a direct one-to-one replacement. Traditional condensed milk works best with granulated sugar.
Can I use evaporated milk?
Yes. Evaporated milk can be used to create an especially rich version, although the final flavour will be slightly different.
Can I make this dairy-free?
Yes. Full-fat coconut milk is one of the easiest alternatives. Use dairy-free butter if desired.
How long does homemade condensed milk last?
When refrigerated in a clean, airtight container, it is best used within about one week.
Can I freeze it?
Yes. Freeze for approximately 2–3 months. Thaw in the refrigerator and stir thoroughly before use.
Why is my condensed milk grainy?
Sugar crystallisation or overheating can sometimes cause graininess. Gentle cooking and avoiding excessive stirring after the mixture becomes very thick can help.
Can I use this recipe in any recipe that calls for canned condensed milk?
Generally yes, provided you reduce the mixture to approximately the same thick consistency. Different recipes may respond differently depending on the exact moisture content.
Servings
Makes: Approximately 2 cups
Preparation Time: 5 minutes
Cooking Time: 45–60 minutes
Cooling Time: 30 minutes
Total Time: Approximately 1 hour 20 minutes
Approximate Nutritional Information
Estimated per 2-tablespoon serving:
- Calories: 115
- Protein: 2 g
- Carbohydrates: 19 g
- Fat: 4 g
- Saturated Fat: 2.5 g
- Sugar: 19 g
- Calcium: approximately 70 mg
- Sodium: approximately 30 mg
Nutritional values are estimates and can vary depending on the milk, sugar, and portion size used.
Final Thoughts
Homemade condensed milk is a simple kitchen staple that can transform ordinary desserts into rich and creamy treats. With just milk, sugar, butter, vanilla, and a little patience, you can create a smooth homemade version that is perfect for baking and desserts.
The most important secrets are using gentle heat, stirring regularly, and remembering that the mixture thickens as it cools. Once you master the basic method, you can easily experiment with chocolate, coconut, cinnamon, coffee, or vanilla variations.
Keep a jar refrigerated and use it whenever you want to add creamy sweetness to your favourite homemade desserts.