
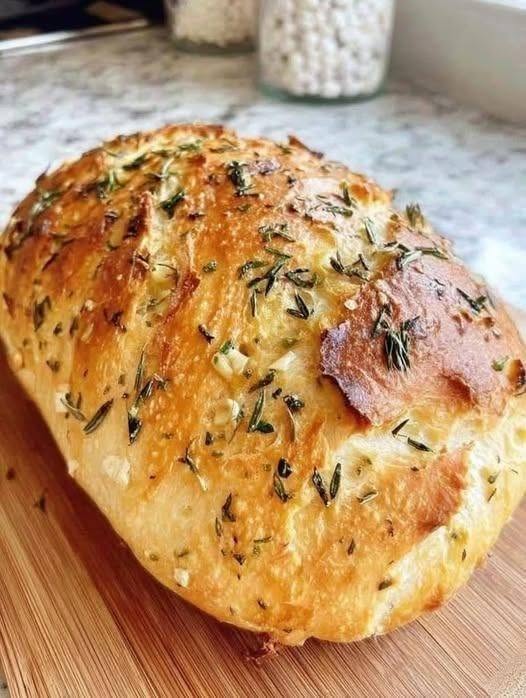
No-Knead Herb Bread (No Eggs, No Butter)
A rustic, crusty, and flavorful homemade bread that requires no kneading, eggs, or butter. This beginner-friendly recipe relies on a long fermentation to develop gluten naturally, resulting in a chewy interior and crisp golden crust. Perfect for sandwiches, soups, dipping in olive oil, or enjoying warm with your favorite spreads.
Description
This no-knead herb bread is soft on the inside with a crispy artisan-style crust. The combination of dried herbs gives the loaf a delicious aroma and savory flavor without overpowering the bread. Since it contains no eggs or butter, it’s naturally dairy-free (if made with olive oil) and suitable for many dietary preferences.
Preparation Time
- Prep Time: 10 minutes
- First Rise: 12–18 hours
- Second Rise: 45–60 minutes
- Bake Time: 40–45 minutes
- Total Time: Approximately 14–20 hours
Servings
- Makes 1 loaf
- Serves 8–10 slices
Ingredients
- 3 cups (375 g) all-purpose flour or bread flour
- 1½ teaspoons salt
- ½ teaspoon instant yeast
- 1 teaspoon dried oregano
- 1 teaspoon dried basil
- ½ teaspoon dried thyme
- ½ teaspoon garlic powder (optional)
- 1¼ cups (300 ml) warm water
- 1 tablespoon olive oil (optional, for a softer crumb)
- Extra flour for dusting
Instructions
Step 1: Mix the Dough
In a large bowl, combine:
- Flour
- Salt
- Yeast
- Oregano
- Basil
- Thyme
- Garlic powder
Add warm water and olive oil.
Mix with a wooden spoon until no dry flour remains. The dough will be sticky.
Cover the bowl with plastic wrap or a towel.
Step 2: First Rise
Leave the dough at room temperature for 12–18 hours.
The dough is ready when:
- It has doubled in size.
- The surface is bubbly.
- It looks airy.
Step 3: Shape
Lightly flour your work surface.
Turn out the dough and gently fold it into a round ball.
Do not knead.
Place on parchment paper.
Cover and let rise for another 45–60 minutes.
Step 4: Preheat Oven
Preheat oven to 450°F (230°C).
Place a Dutch oven (or heavy oven-safe pot with lid) inside while preheating.
Step 5: Bake
Carefully remove the hot pot.
Lift the dough using the parchment paper and place it inside.
Cover with the lid.
Bake:
- 30 minutes covered
- 10–15 minutes uncovered until golden brown
Internal temperature should reach approximately 200–210°F (93–99°C).
Step 6: Cool
Transfer to a cooling rack.
Allow the bread to cool for at least 1 hour before slicing.
Chef’s Notes
- Bread flour produces a chewier texture.
- All-purpose flour creates a softer loaf.
- Olive oil is optional but improves softness.
- Long fermentation develops flavor naturally.
- Fresh herbs can be used but contain more moisture; chop them finely.
- Avoid adding too much extra flour during shaping.
Tips for Success
- Use fresh yeast for the best rise.
- Sticky dough is normal.
- Don’t skip the long fermentation.
- A Dutch oven creates bakery-style steam for a crisp crust.
- Cool completely before slicing to prevent a gummy texture.
- Store herbs in an airtight container to preserve their flavor.
Variations
- Add ¼ cup grated vegan Parmesan.
- Mix in chopped rosemary.
- Add roasted garlic cloves.
- Include sun-dried tomatoes.
- Sprinkle sesame or poppy seeds on top.
- Add cracked black pepper for extra flavor.
Storage
Room Temperature
- Store in a bread bag or wrapped in a clean towel for up to 3 days.
Refrigerator
- Not recommended, as it can dry out the bread.
Freezer
- Slice and freeze for up to 3 months.
- Reheat directly from frozen in a toaster or oven.
Nutritional Information (Per Slice, assuming 10 slices)
- Calories: 145
- Carbohydrates: 29 g
- Protein: 4 g
- Fat: 1.8 g
- Saturated Fat: 0.3 g
- Fiber: 1.5 g
- Sugar: 0.3 g
- Sodium: 350 mg
- Potassium: 45 mg
- Calcium: 10 mg
- Iron: 1.6 mg
Values are approximate and may vary depending on ingredients used.
Health Benefits
- No eggs or butter: Suitable for many vegan and dairy-free diets (when using olive oil).
- Lower in saturated fat: Compared to enriched breads made with butter.
- Herbs provide antioxidants: Oregano, thyme, and basil contain beneficial plant compounds.
- Energy source: Complex carbohydrates provide sustained energy.
- Simple ingredients: Free from many common additives found in commercial breads.
- Versatile: Pairs well with healthy soups, salads, and protein-rich meals.
Frequently Asked Questions (Q&A)
Q: Can I use fresh herbs instead of dried?
A: Yes. Use about three times the amount of fresh herbs, finely chopped, since fresh herbs are milder than dried.
Q: Can I make this without a Dutch oven?
A: Yes. Bake on a preheated baking tray or pizza stone and place a pan of hot water on the lower oven rack to create steam.
Q: Why is my dough so sticky?
A: No-knead dough is naturally wetter than traditional bread dough. Resist adding too much flour, as it can make the loaf dense.
Q: Can I use whole wheat flour?
A: Yes. Replace up to half of the all-purpose flour with whole wheat flour. For a 100% whole wheat loaf, add a little extra water, as whole wheat absorbs more moisture.
Q: Can I add cheese?
A: Yes. Mix in about ½ cup of shredded cheese or a dairy-free alternative during the initial mixing stage.
Q: How do I know the bread is fully baked?
A: The crust should be deep golden brown, the loaf should sound hollow when tapped on the bottom, and the internal temperature should reach about 200–210°F (93–99°C).
Q: Can I prepare the dough ahead of time?
A: Yes. After the first rise, you can refrigerate the dough for up to 24 hours before shaping and baking. Let it sit at room temperature for 30–60 minutes before baking.
Q: What can I serve with this bread?
A: It’s excellent with soups, stews, salads, olive oil and balsamic vinegar, hummus, avocado, roasted vegetables, or your favorite sandwich fillings.